Technology made easy: How to make your own cat 5 cable. follow the below steps practically. comment for any confusion.

REQUIREMENTS
 that contains everything (plus a line testing tool):

If you somehow accidentially cut the internal wires, just cut the wire an inch down and try stripping again. (So, leave yourself a few spare inches in case you mess up.)
After you strip, you'll find 8 color-coded wires inside.
If you want to follow a popular convention use the "568B" ordering. The 568B ordering is:

(If you want to make a less common "patch" or "cross-over" cable for going directly from computer-to-computer instead of computer-to-router/modem/hub/switch, you'll need to have a slightly different order on both ends. Actually, you rarely need to make a patch cable these days, since many devices auto-detect which kind of cable is plugged in. If you're not sure what to do, make the standard cable I describe above.)
Once they're in the right order in the plug, push them flush against the tip.
Then, insert the plug into the crimp tool and squeeze.
Cat 5 plugs contain metal "teeth" that pierce the colored wires during crimping to create electrical conductivity.
Repeat this process for the other end, and you're done.
REQUIREMENTS
- A length of bulk, uncrimped cable
:
- A crimp tool
:
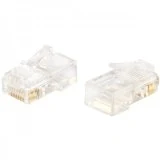
- A box of cat 5 plugs
:


Three-steps: Strip, Arrange, Crimp
After you've cut the cable to desired length and run it between two locations, it's time to attach the plugs. Fortunately, it's a simple three-step process at each end.Step 1: Strip
Using the stripping razor on the crimp tool, strip 3-5 millimeters off the sheath at the end of the cable. (Crimp tools have a special razor that cuts the sheath without cutting the internals, but you can use any sharp blade or pair of scissors if you're careful.)If you somehow accidentially cut the internal wires, just cut the wire an inch down and try stripping again. (So, leave yourself a few spare inches in case you mess up.)
After you strip, you'll find 8 color-coded wires inside.
Step 2: Arrange
For making a standard cat 5 cable, you'll want to arrange the color-coded wires in the same order on both ends. It actually doesn't matter which order you put the colors in, as long as it's the same on both ends.If you want to follow a popular convention use the "568B" ordering. The 568B ordering is:
- White/orange striped.
- Solid orange.
- White/green striped.
- Solid blue.
- White/blue striped.
- Solid green.
- White/brown striped.
- Brown.
Notes
If you're interested in the details, you technically only need to get 4 of the wires in the same position for 10/100 ethernet. 10/100 uses two internal wires (wire 1 and wire 2) to create a circuit for sending, and two internal wires to create a circuit for receiving (wire 3 and wire 6). It's still a good idea to use the same ordering on both ends, since ever more devices (like gigabit ethernet, home security cameras or HDMI transceivers) can run over cat 5 lines with each passing year, and these devices expect all of the wires to be in the right place.(If you want to make a less common "patch" or "cross-over" cable for going directly from computer-to-computer instead of computer-to-router/modem/hub/switch, you'll need to have a slightly different order on both ends. Actually, you rarely need to make a patch cable these days, since many devices auto-detect which kind of cable is plugged in. If you're not sure what to do, make the standard cable I describe above.)
Step 3: Crimp
Insert the colored wires into the cat 5 plug. I recommend "scooping" them into the plug, since you probably had to fan them out to put them in the right order. After you've scooped them, double check that they stayed in the right order. It may take a scoop or two to get it right.Once they're in the right order in the plug, push them flush against the tip.
Then, insert the plug into the crimp tool and squeeze.
Cat 5 plugs contain metal "teeth" that pierce the colored wires during crimping to create electrical conductivity.
Repeat this process for the other end, and you're done.
SHARE THIS POST
0 comments:
Post a Comment